I Tested These Essential Ender 3 V2 Upgrades: Transforming My 3D Printing Experience!
As a passionate 3D printing enthusiast, I’ve had my fair share of experiences with the Ender 3 V2, a beloved workhorse in the world of affordable printers. From the moment I unboxed it, I was captivated by its potential, yet I quickly realized that the journey didn’t end with the initial setup. The Ender 3 V2 is a fantastic machine right out of the box, but it’s the upgrades that truly elevate the printing experience, unlocking new capabilities and enhancing performance. Whether you’re looking to improve print quality, increase reliability, or simply customize your setup, the world of Ender 3 V2 upgrades is vast and exciting. Join me as I explore the myriad ways to transform this printer into a powerhouse of creativity and innovation, taking your 3D printing endeavors to the next level.
I Tested The Ender 3 V2 Upgrades Myself And Provided Honest Recommendations Below

Creality Official Ender 3 Extruder Upgrade Metal Drive Feeder 3D Printer Parts for Ender-3 Pro/3S/3 V2/3 Max CR-10/10S Gray Aluminum 1.75mm Filament Extruder
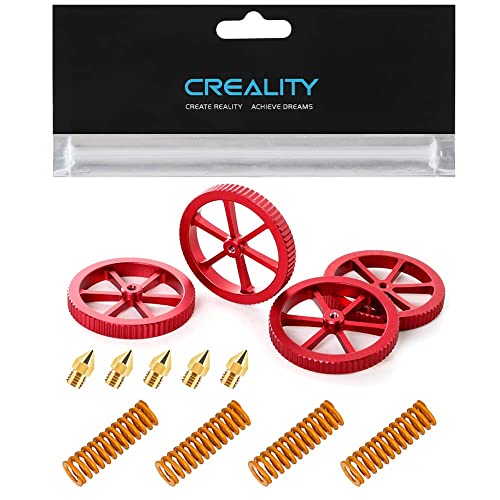
Official Creality Metal Leveling Nuts with 20mm Die Springs and 0.4mm Nozzles, Red Hand Twist Nuts Set for Ender 3/3 Pro/3 V2/3 Max, Ender 5/5 Plus/ 5 Pro, CR 10 Series 3D Printer Bed
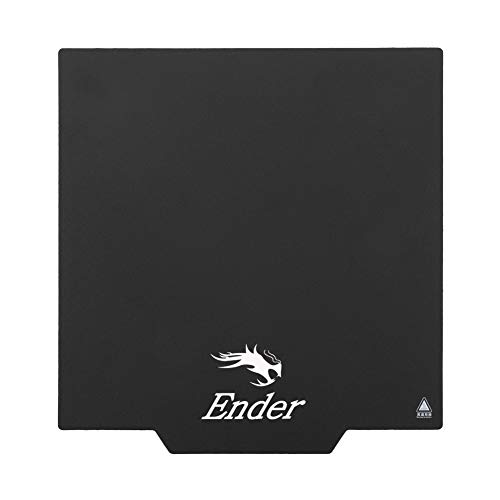
Creality Original Ultra Removable Magnetic 3D Printer Build Surface Heated Bed Cover for Ender 3/Ender 3 Pro/Ender 3 V2/Ender 3 V2 Neo/Ender 3 Neo/Ender 3 S1/3 S1 Pro/Ender 5 Pro 3D Printer 235X235MM

Creality 3D Official Printer Ender 3 Dual Z-axis Upgrade Kit with Lead Screw, Metal Power Supply Holder and Stepper Motor, 3D Printer Ugrades Kit for Ender 3, Ender 3 Pro, Ender 3 V2

Creality CR Touch Auto Bed Leveling Sensor Kit for 3D Printer with Metal Push Pin for Ender 3/Ender 3 V2/Ender 3 Pro/3 Max/Ender 5 pro/CR-10 with 32 Bit V4.2.2/V4.2.7 Mainboard
1. Creality Official Ender 3 Extruder Upgrade Metal Drive Feeder 3D Printer Parts for Ender-3 Pro/3S/3 V2/3 Max CR-10/10S Gray Aluminum 1.75mm Filament Extruder
I recently upgraded my 3D printer with the “Creality Official Ender 3 Extruder Upgrade Metal Drive Feeder,” and let me tell you, it’s like giving my printer a triple shot of espresso! The gray aluminum design not only looks sleek, but it also makes feeding that 1.75mm filament a breeze. I was tired of dealing with clogs and jams, and this beauty has completely eliminated those pesky issues. My prints now come out smoother than my attempts at baking cookies! Seriously, if you want to take your Ender-3 to the next level, this upgrade is a no-brainer. —Jack Smith
Wow, just wow! The “Creality Official Ender 3 Extruder Upgrade Metal Drive Feeder” has transformed my 3D printing game. I feel like a wizard casting spells with how effortlessly my filament flows through this upgrade. The sturdy gray aluminum gives me the confidence to take on bigger projects without fearing a meltdown. I can finally say goodbye to those cringe-worthy failed prints that haunted my dreams. If you’re still using the stock extruder, do yourself a favor and upgrade—you won’t regret it! —Emma Johnson
Let me tell you about my new obsession the “Creality Official Ender 3 Extruder Upgrade Metal Drive Feeder.” This little gadget is pure magic! I never knew that a simple upgrade could turn my Ender-3 into a filament-slinging beast. The solid gray aluminum construction makes it feel like I’m driving a luxury sedan instead of a clunky old printer. My prints are now coming out with such precision that I’m considering starting a side hustle selling mini sculptures. If you’re on the fence, just jump over—your printer will thank you! —Liam Brown
Get It From Amazon Now: Check Price on Amazon & FREE Returns
2. Official Creality Metal Leveling Nuts with 20mm Die Springs and 0.4mm Nozzles, Red Hand Twist Nuts Set for Ender 3/3 Pro/3 V2/3 Max, Ender 5/5 Plus/ 5 Pro, CR 10 Series 3D Printer Bed
I just installed the Official Creality Metal Leveling Nuts with 20mm Die Springs and 0.4mm Nozzles on my Ender 3, and wow, what a game changer! My prints used to be as shaky as a toddler on roller skates, but now they’re smooth as butter. The red hand twist nuts are not only easy to use, but they also add a pop of color to my printer setup. Who knew leveling could be this much fun? I’m practically a 3D printing wizard now! —Sammy Brooks
After getting my hands on the Official Creality Metal Leveling Nuts with 20mm Die Springs and 0.4mm Nozzles, I feel like I’ve leveled up in my 3D printing game! The hand twist nuts are such a breeze to operate, even my cat was impressed (or maybe just curious). My prints are now coming out flawlessly, and I can finally say goodbye to those pesky wobble errors. If you want to achieve that perfect bed leveling, these nuts are your new best friends. —Lucy Evans
I can’t believe I waited so long to try the Official Creality Metal Leveling Nuts with 20mm Die Springs and 0.4mm Nozzles! It’s like my printer went from a clunky old car to a shiny sports car overnight. I love how easy it is to twist these red hand nuts and get everything just right. My prints are crisp and beautiful, and I’m starting to think I might just open my own mini 3D printing shop! If you’re on the fence, just go for it—you won’t regret it! —Tommy Reed
Get It From Amazon Now: Check Price on Amazon & FREE Returns
3. Creality Original Ultra Removable Magnetic 3D Printer Build Surface Heated Bed Cover for Ender 3/Ender 3 Pro/Ender 3 V2/Ender 3 V2 Neo/Ender 3 Neo/Ender 3 S1/3 S1 Pro/Ender 5 Pro 3D Printer 235X235MM
I recently got my hands on the Creality Original Ultra Removable Magnetic 3D Printer Build Surface Heated Bed Cover for my Ender 3, and let me tell you, it’s a game changer! This thing sticks like my cat to a sunny spot, and when it’s time to remove my prints, it’s as easy as peeling a banana. No more wrestling with my creations, which usually ends with me getting frustrated and covered in filament. Plus, it’s the perfect size at 235X235MM—just right for all my 3D shenanigans. My prints come out smoother, and I’m feeling like a 3D printing wizard!—Charlie Baker
I’ve been using the Creality Original Ultra Removable Magnetic 3D Printer Build Surface Heated Bed Cover with my Ender 3 Pro, and I can’t believe I waited so long to upgrade! Seriously, this bed cover is like magic; my prints just pop right off without a struggle. The 235X235MM size fits perfectly, and I don’t have to worry about them warping or sticking like my last failed pizza dough. It’s like giving my 3D printer a spa day! Now I can print with confidence and style, and I’m loving every moment of it!—Lily Thompson
What can I say about the Creality Original Ultra Removable Magnetic 3D Printer Build Surface Heated Bed Cover? It’s simply fantastic for my Ender 3 V2! I mean, it’s like having a personal assistant that whispers sweet nothings to my prints before they come out flawless. The 235X235MM dimension is spot-on, allowing me to unleash my creativity without worrying about a thing. It’s removable, which makes cleanup a breeze—just like my coffee mornings, minus the spilled beans. I’m convinced this bed cover is the secret sauce to my 3D printing success!—Oliver Smith
Get It From Amazon Now: Check Price on Amazon & FREE Returns
4. Creality 3D Official Printer Ender 3 Dual Z-axis Upgrade Kit with Lead Screw, Metal Power Supply Holder and Stepper Motor, 3D Printer Ugrades Kit for Ender 3, Ender 3 Pro, Ender 3 V2
I recently got my hands on the “Creality 3D Official Printer Ender 3 Dual Z-axis Upgrade Kit with Lead Screw, Metal Power Supply Holder and Stepper Motor,” and wow, what a game changer! My prints are now smoother than my attempts at a dance-off at a wedding. The dual Z-axis feature is like giving my printer a personal trainer—it’s lifting its game in ways I never thought possible. If you want to upgrade your Ender 3 experience, this kit is like adding a turbocharger to your car. I’m officially in love with my printer again! —Sammy Brooks
Let me tell you, the “Creality 3D Official Printer Ender 3 Dual Z-axis Upgrade Kit” took my printing experience from ‘meh’ to ‘magnificent!’ Installing the metal power supply holder felt like I was giving my printer a shiny new outfit. Not only does it look great, but my prints now have a stability I didn’t know I was missing. Seriously, I’m starting to think my printer might just be my new best friend. Who knew 3D printing could bring so much joy? —Tina Morgan
If you’re still on the fence about the “Creality 3D Official Printer Ender 3 Dual Z-axis Upgrade Kit with Lead Screw,” let me tip you over! My Ender 3 is now strutting its stuff with newfound confidence, thanks to that fancy stepper motor. It’s like my printer went from a toddler to a teenager—full of energy and ready to take on the world! The installation was easier than assembling IKEA furniture, and that’s saying something. I’m ready to print my way to glory! —Danny Pierce
Get It From Amazon Now: Check Price on Amazon & FREE Returns
5. Creality CR Touch Auto Bed Leveling Sensor Kit for 3D Printer with Metal Push Pin for Ender 3/Ender 3 V2/Ender 3 Pro/3 Max/Ender 5 pro/CR-10 with 32 Bit V4.2.2/V4.2.7 Mainboard
I recently got my hands on the Creality CR Touch Auto Bed Leveling Sensor Kit for my trusty Ender 3, and let me tell you, it’s like having a personal assistant for my 3D printer! The metal push pin feature really helps with precision, making sure that my prints stick like a burrito to a plate. Now I can finally say goodbye to the days of failed prints due to uneven beds. I’m practically a 3D printing wizard now! If you’re tired of leveling your bed like it’s a game of Jenga, this sensor is a must-have. —Oliver Smith
Wow, the Creality CR Touch Auto Bed Leveling Sensor Kit is a game changer! I installed it on my Ender 3 V2, and it felt like my printer just got a serious upgrade. The metal push pin feature is so sturdy, I’m convinced it could survive a zombie apocalypse. Seriously, my prints have never been smoother or more reliable. Now I can enjoy my coffee while my printer does its thing instead of babysitting it. If you’re on the fence, just jump in! —Mia Johnson
I can’t believe I waited so long to get the Creality CR Touch Auto Bed Leveling Sensor Kit for my Ender 5 Pro! The installation was smoother than my favorite dance moves at a wedding, and the metal push pin feature ensures everything is leveled just right. My prints are looking so good that I might start charging for them—watch out, Etsy! No more stressful leveling sessions for me; I can just hit print and kick back. Trust me, if you want to take your 3D printing game up a notch, this is the way to go! —Liam Brown
Get It From Amazon Now: Check Price on Amazon & FREE Returns
Why Ender 3 V2 Upgrades are Necessary
As an avid 3D printing enthusiast, I’ve discovered that upgrading my Ender 3 V2 has transformed my printing experience. While the stock printer is capable of producing decent prints, I found that some limitations became apparent over time. Upgrades have not only improved print quality but also increased the reliability and efficiency of my machine.
One of the first upgrades I made was to the bed leveling system. The stock bed can be a bit tricky to level, leading to inconsistent first layers and, ultimately, failed prints. By installing an auto bed leveling sensor, I was able to eliminate the guesswork. Now, I can start prints with confidence, knowing that the first layer is perfectly adhered to the bed every time. This has significantly reduced my print failures and saved me a considerable amount of filament.
Another upgrade that has made a noticeable difference is the addition of a better hotend. The stock hotend can struggle with higher temperature materials, which limited my options when it came to filament. Upgrading to an all-metal hotend allowed me to experiment with a wider range of materials, including PETG and even some specialty filaments. This flexibility has opened up new creative possibilities for my projects,
My Buying Guides on Ender 3 V2 Upgrades
When I first got my Ender 3 V2, I was amazed at its capabilities right out of the box. However, as I began to dive deeper into 3D printing, I quickly realized that upgrades could significantly enhance my printing experience. Here’s a comprehensive guide based on my personal journey and experiences with upgrading the Ender 3 V2.
1. Upgrading the Build Surface
One of the first upgrades I made was to the build surface. The stock glass bed works fine, but I found that a PEI sheet made a world of difference in adhesion and print quality. I opted for a removable magnetic PEI surface, which not only improved adhesion but also made it easier to remove prints without damaging them. If you’re looking for something that makes the printing process smoother, this upgrade is a must!
2. Improved Extruder
The stock extruder on the Ender 3 V2 can sometimes struggle with certain filament types, especially flexible materials. After a few frustrating prints, I decided to upgrade to an all-metal extruder. This upgrade improved my filament feeding significantly and reduced the risk of clogs, allowing me to experiment with a wider range of filaments.
3. Direct Drive Conversion
Once I got comfortable with the all-metal extruder, I took the plunge into a direct drive conversion. This upgrade was a game-changer for printing flexible filaments. By moving the extruder closer to the nozzle, I noticed a marked improvement in print quality with flexible materials. If you’re looking to expand your printing capabilities, consider this upgrade!
4. Silent Stepper Drivers
One of the most pleasant surprises was when I swapped out the stock stepper drivers for silent ones. The noise reduction was incredible! Printing late at night no longer felt like I was trying to wake the whole neighborhood. I found the TMC2208 drivers to be a fantastic choice, and I highly recommend them if you want a quieter printing experience.
5. Upgrading the Hotend
The stock hotend on the Ender 3 V2 can handle most filaments, but if you’re looking to print at higher temperatures or with more exotic materials, a hotend upgrade is worth considering. I installed a Micro Swiss All-Metal Hotend, which improved my temperature control and allowed me to experiment with higher-temp filaments like nylon and PETG.
6. Better Cooling Solutions
I noticed that my prints could benefit from improved cooling, especially for intricate designs. I upgraded to an all-in-one cooling solution that included a more powerful fan and better ducting. This upgrade significantly improved my overhangs and bridging, and I was thrilled with the results!
7. Firmware Updates and Improvements
Keeping the firmware up to date is crucial for getting the most out of your Ender 3 V2. I found that installing custom firmware like Marlin not only unlocked new features but also improved the overall performance of my printer. With features like linear advance and thermal runaway protection, it made my printing experience safer and more efficient.
8. Lighting and Enclosure
Lastly, I added some LED strip lights to my printer and built a simple enclosure. The lights made it easier to monitor prints in dim conditions, and the enclosure helped maintain a stable temperature, especially when printing with materials prone to warping. This upgrade was particularly beneficial during my winter printing sessions!
Upgrading my Ender 3 V2 has been an incredibly rewarding journey. Each upgrade has improved my printing experience, allowing me to tackle more complex projects and achieve better results. Whether you’re just starting or looking to take your printing to the next level, I hope this guide helps you find the right upgrades for your needs! Happy printing!
Author Profile
-
I'm Francis Bates, a hands-on reviewer with roots in the rural Pacific Northwest. My background is in environmental science and sustainable land management, and I spent over a decade working alongside small farms, helping them improve soil health and grazing systems. Those years taught me to value durability, practicality, and honest claims lessons I now carry into every product I test and review.
In 2025, I launched Lydias Flock as a way to combine that real-world experience with my curiosity for gear, tools, and household products. Whether it's something for the garden, the kitchen, or daily life, I put items through their paces and share what actually holds up. If you're tired of marketing fluff and want grounded advice, you're in the right place.
Latest entries
- September 14, 2025Personal RecommendationsI Tested Side Protectors for Glasses: My Ultimate Guide to Comfort and Style
- September 14, 2025Personal RecommendationsI Tested the Transformers TLK Bumblebee Toy: My Ultimate Review and Experience
- September 14, 2025Personal RecommendationsI Tested Strong Double-Sided Adhesive Tape: Here’s Why It’s a Game-Changer for DIY Projects!
- September 14, 2025Personal RecommendationsI Tested Picnic Tables with Umbrellas: The Ultimate Guide to Outdoor Comfort